Streaming Learning Center Where Streaming Professionals Learn to Excel

Related Articles

By way of background, J Street is a pro-Israel, pro-peace organization for American Jews and other supporters of Israel. Though I am Jewish, I’m guessing Brendon didn’t know that when he got in touch. For me, though, being Jewish and having been to Israel multiple times, it made sessions like What if Israel attacks Iran, and One-State, Two-State, Green State, Blue State, fascinating watching, particularly the intelligent and articulate Palestinian participants who erased the ghost of Yasser Arafat as the face of the Palestinian people for me. But I wasn’t there to develop my personal ideology; I was there to stream some video.
Specifically, Brendon had contracted to stream eleven sessions held in two separate rooms over the three day convention, and then deliver full-resolution archives that J Street would convert to on-demand files for posting to YouTube. Most of the video work and projection was done by other companies; Brendon was in charge of streaming a feed provided by one of these companies in the main ballroom, and of shooting and streaming several high-profile sessions in a separate meeting room.
I was the final, and least experienced, team member. The other two were associates of Event Technology Partners, including shooter Manrico Zottig, who had great stories from his time travelling with Republican candidates Fred Thompson and Sarah Palin during the run up to the 2008 presidential election, and webcast guru Bern Rexer.
Over the three-day event, I learned a lot about shooting and streaming from these experienced pros, and a lot about the realities of streaming events where you don’t control critical factors like the set background and lighting. I’ll share these observations with you in three parts. For the rest of this installment, I’ll detail the planning process and setup in each of the two rooms from which we streamed.
In Part 2, I’ll discuss specific skills that I learned or reinforced during the event, including issues like the optimal framing for speakers on a panel, controlling audio volume during the event, and stream monitoring practices in general. In the final article, I’ll detail the connections that we used between video gear and encoding stations and how we resolved sound-sync issues resulting from our initial setup. I’ll also provide a quickie review of the new HP Z1 Workstation, which was the encoding station that I used during the event.
Pre-Conference Planning
Planning focused on issues like connectivity, the selection of the live streaming service provider, scheduling, and equipment. Brendon had the first issue resolved before I got involved, with dedicated on-site connectivity provided by Smart City Networks. Brendon had arranged for J Street to contract for 1.54 Mbps upload and download, though the actual connection, as tested by Speedtest.net, was closer to 3 Mbps upload and 1.5 Mbps download. This was shared between the two rooms from which we were broadcasting, which was acceptable only because we would never broadcast simultaneously.
If you’re new to live event streaming, I can’t make this point strongly enough: If you don’t have sufficient and preferably dedicated connectivity, you don’t have live streaming. Get pricing for connectivity before you submit your bid, and don’t even think about using shared connectivity that may be available at the venue. For example, while the Washington Convention center itself offered free Wi-Fi, it averaged around 70 Kbps in both directions on the day of the event, just slightly higher than a 56 Kbps modem. We ultimately streamed at a combined data rate approaching 900 Kbps, which gave us plenty of headroom on the connection. Absent the dedicated connectivity that Brendon arranged for, we would not have been streaming.
Choosing a Live Streaming Service Provider
One of the first decisions that we made as a group was the selection of the live streaming platform. Brendon had used other services in the past, but was looking for a service that could stream to mobile devices, and provide links to social media if desired by the client. Livestream was one of the services under consideration, and since I was very familiar with its operation, Brendon decided to sign up for a Network Plan.
This gave Brendon the right to create up to ten premium channels that stream without advertising. Interestingly, these channels are transferable, so once the event was over, and the on-demand videos were posted to Vimeo, Brendon could delete the J Street channel and reclaim the premium channel.
On the equipment front, Bern and I discussed the various feeds that we’d be getting from the audio/video gear, and how we’d feed that into our encoding workstations, which I’ll detail in the third installation. Brendon discussed where we’d be staying, when we’d need to show up and where, and how we’d allocate work during the event. He encapsulated all this into a “Webcast Production Book” that contained schedules, locations, phone numbers, streaming and archiving instructions, and the like. Very professional, and very valuable and frequently referenced during the event. If you’re producing an event that involves multiple participants in multiple places, you should consider creating a similar document.
On the Ground in DC
I arrived in DC at the appointed hour and toured the two rooms. In all previous events that I had produced, I supplied lighting, advised on the set background and clothing, and placed and selected the AV gear. In this show, there were multiple moving parts, of which our group was just one. In short, we took what we got from a set design perspective.
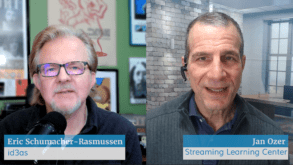
In the main ballroom, the speakers were set against a backlit curtain, which provided great contrast from the background, creating a neat, crisp image for all the speakers that I saw. You can see this in Figure 2 (below).
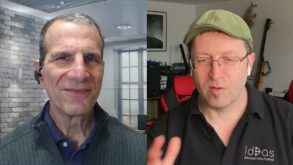
On the other hand, in the meeting room, the background was a simple black curtain, which proved less than optimal for the many speakers with black suits, black hair, or both. You can see this in Figure 3 (below).
One solution would have been multiple back lights, shining down on the head and shoulders of the various speakers on the panel. Not being in charge of lighting, however, we did the best we could with the background we were given.
If you do have control over set design and lighting, here are a few recommendations:
Consider using a lighter background color than black; perhaps gray or blue.
Advise the speakers as to what colors to wear, and which to avoid, and also to avoid highly detailed fabrics like tight pinstripes and herringbones. So, if you do go with a black background, advise the speakers to wear light gray or blue.
Install backlights to enhance the contrast between speaker and background.
If possible, install lights on the sides of the room to supplement the overhead fluorescents. This will help make sure that the faces are evenly lit, rather than the bright forehead/dark chin produced by solely overhead lighting.
That’s it for installment one; back in a week with the shooting and monitoring skills I picked up during the event.